When we think about taking long exposures with a camera,
night time images usually come to mind. Only dark conditions generally call for
slow shutter speeds, right?
True-but there is a way to take time exposures in broad
daylight...with surprising results.
So the first question that comes to mind is: how do you take
a long exposure in bright light? Won’t the camera try to set a fast shutter
speed to ensure that the exposure is correct, regardless of how small the aperture
is set?
Then there’s the other question: why would you want to take
long exposures in daytime, anyway?
OK - a long time exposure (keeping the camera’s shutter open
for a long time – from seconds to minutes) will occur when:
- Light level is very low
- A very small aperture is
chosen, and
- ISO is set to the lowest
value that the camera will allow.
So, to answer the first question, you need to simulate low
light conditions by giving your camera dark sunglasses. The device that will do
this is an inexpensive thread-on piece of glass called a neutral density (ND) filter.
These filters come in a wide variety of grades and are either specified in
‘stops’ or ‘times’. They are also
available as variable grade versions, often referred to as Fader NDs. Be sure
to buy one that has the same filter thread diameter as your lens .
.
A one-stop (or two times) ND filter, with aperture and ISO
remaining the same, will require that you force the shutter to stay open twice
as long to get the same exposure as you would without the filter. Similarly, a
two-stop filter will require slowing the shutter by four times, since a stop
means a factor of two in exposure. For the kind of images I’m proposing we
take, you will need a ten-stop filter in order to get exposures that are minutes long. This is equivalent to
increasing exposure by a factor of 1024 times, but is usually referred to as a
1000 times filter.

Why minutes? Well, in answer to the second question above,
anything moving (water, clouds) will take on a foggy (in the case of waves) or
streaky (in the case of clouds) look. As long as you have stationary elements
in the scene, such as rocks, ground and a tree trunk in the sample shots shown in
this post, the viewer is confronted with a paradox that doesn’t appear
‘natural’. This makes for a more interesting image than if you had captured the
same scene with a shutter speed of, say, 1/250th of a second. While
these images were shot in colour, I converted them to black and white, since
they tend to look more dramatic that way.
And now for the practical considerations. You will need:
- A stable tripod
- A remote shutter release
that plugs into your camera, since you can’t hold down the shutter button
on your camera for minutes without jarring it. You can also get an
intervalometer, which allows you to set a specific time interval without
having to manually time the shutter.
- A camera with a Manual
mode that will allow you to set the shutter to ‘Bulb’, or one that has a
dedicated Bulb mode.
- A day with calm winds, so
that your tripod doesn’t get buffeted during the exposure.
Look for a scene that has a combination of moving and
stationary components. Getting the right exposure is definitely going to take
some experimentation. As a starting point, set your camera’s ISO to the lowest
value it provides. This is typically 100. Do NOT use Auto ISO. In Manual / Bulb
mode, set the aperture to a value anywhere in the range of f/16 to f/22. This
will depend on whether it’s an overcast or sunny day. You should get exposures
in the range of 2 to 4 minutes. Use the histogram to confirm good exposure and
tweak the time (or aperture) as needed to get perfect exposure or desired
motion effect.
With digital SLRs, a practical consideration is the heating
of the sensor during long exposures. While it won’t damage the camera, this
heating tends to amplify what are often referred to as ‘stuck pixels’. Every
camera has them, and they appear as unexpected bright spots on the final image.
To combat this, DSLRs generally have a long exposure noise
reduction setting which can mitigate this annoyance. Unfortunately, it requires
that the camera will make you wait twice as long to see your image, since it
takes as long again as the exposure time to process out the stuck pixels. This
could result in an 8 minute wait until you take the next shot. While this
technique is effective, I prefer to take my chances and fix the spots after in
either Lightroom or Photoshop.
By way of a summary, here are the steps I take:
- Set up the camera on the
tripod and compose the scene with the chosen lens.
- Ensure ISO is at its
lowest setting, and choose a small aperture to help force a long exposure
and to give me the depth of field I want.
- Plug in the remote shutter
release or intervalometer (and set it to the exposure time I want).
- Thread on the ten-stop ND
filter, being careful not to disturb focal length or focus settings.
- Cover up the eyepiece if
the sun is behind me, to prevent light leak onto the image (it has
happened to me!)
- Check my image and
histogram, rinse and repeat until I get the right exposure and effect.
It’s a slow process that requires patience. At the end of it
though, you will get images that will be set apart from the ordinary.
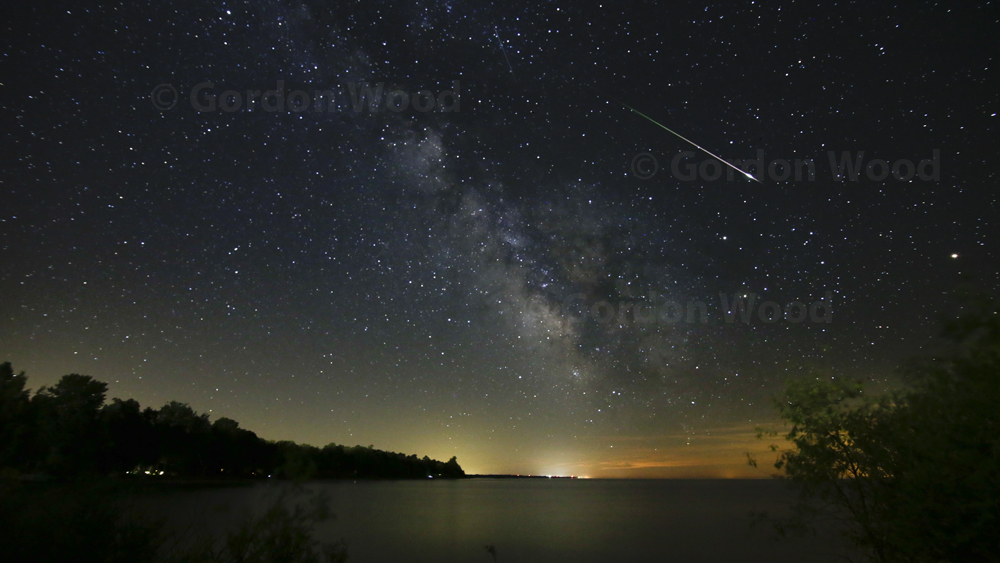 There I was at Point Clark, Ontario on the edge of Lake Huron with a friend, innocently taking a time lapse sequence of the gorgeous night sky. Just a few frames from the end of my 150-frame sequence, probably the brightest meteor I have seen in recent years streaked across the sky.


